Getting started
onestation is a Mac app that puts every question, approval and finished task from your coding agents into one Inbox. Setup takes about two minutes.
What you need#
- A Mac with macOS 13 Ventura or later, Apple silicon or Intel. One universal download covers both.
- At least one coding agent you already use: Claude Code, Codex, Pi, OpenCode, Gemini CLI, Aider, Amp or Grok.
- No account and no card. The 3-day trial starts on first launch.
Install#
- Download
Get the disk image from onestation.dev/download.
- Drag onestation to Applications
Double-click the
.dmgin your Downloads folder, then drag onestation onto the Applications folder. Run it from Applications, not from the disk image, so automatic updates can replace it. - Open it
Launch onestation from Applications or Spotlight (⌘ Space, type “onestation”).
If macOS won’t open it#
onestation is signed with an Apple Developer ID and notarized by Apple. On first launch macOS shows its standard question: “onestation” is an app downloaded from the Internet. Are you sure you want to open it? Click Open.
If macOS says the app can’t be opened instead:
- Open Privacy & Security
System Settings
Privacy & Security , then scroll down to the Security section. - Click Open Anyway
Next to the message about onestation, click Open Anyway and confirm with your password or Touch ID.
Do this only for a copy you downloaded from onestation.dev. If the message says the app is damaged, delete it and download it again.
The setup guide#
The first launch opens a short guide. Every step can be skipped and finished later from the banner in your Inbox.
- Your trial starts
3 days with everything unlocked. You get a heads-up the day before it ends.
- Permissions
Accessibility for the shortcut, Notifications for banners, and optionally Screen Recording. See Permissions explained.
- Practice the shortcut
Tap ⌥ twice, quickly. From any app it opens your Inbox when an agent is waiting, and Talk when nothing is.
- herdr
Install herdr (about a minute) and bring the agents already running in your terminals along. See Moving agents into herdr.
- A heads-up on file prompts
When an agent opens Documents, Desktop or Downloads, macOS asks first. Allow it when it’s your agent at work.
- The pill
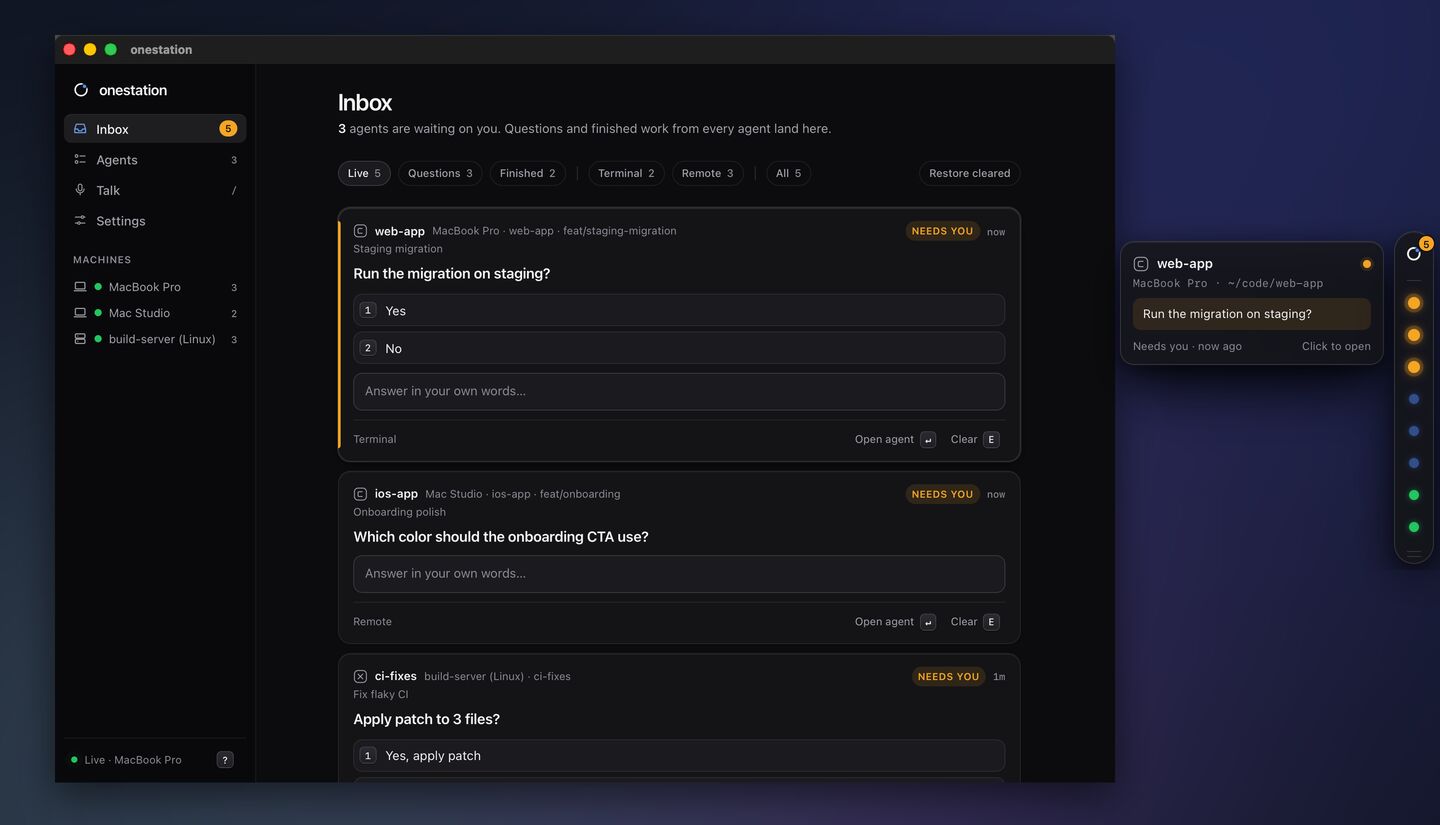
onestation lives on the side of your screen. One dot per agent: amber needs you, blue is working, green is done, red is stuck. Click it for your Inbox; drag it to any edge.
- Choose a plan
Or keep using the trial. Checkout opens in your browser and the window updates by itself.
To run the guide again: onestation
Your first answer#
Start Claude Code or Codex as usual. Within seconds it appears in the pill. When it asks something, a card lands in the Inbox with a sound. Press the number of the option you want, or R to type your own reply. Every answer waits two seconds so Esc can take it back. More in Answering agents.
Updates#
onestation checks for signed updates once a day and installs them after pending answers are sent. To check right away, click Check Now in onestation
Still stuck?Email us with what you tried. A person reads every message, usually within one working day (CET).
Email support